14.5.7 Provider Payment
From this menu you can Bulk Update students who have Service
Payment Details added, e.g.: OSHC, Homestay Placement, Airport Pickup
etc. etc.
14.5.7.1 Once you have logged into RTOmanager, click Accounts
on the main menu then go to �Provider Payment� sub menu as shown below
in figure 14.5.7a
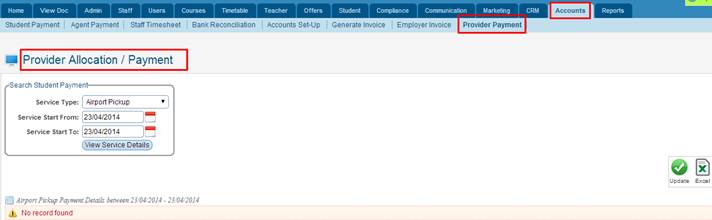
Figure 14.5.7a
14.5.7.2 Simply Select the Service Type and
enter in the Service Start From & To Dates then click on  . Your page now should
look like the one below in figure 14.5.7b . Your page now should
look like the one below in figure 14.5.7b
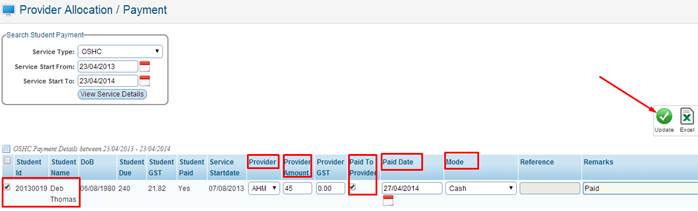
Figure 14.5.7b
For tutorial purposes we only have one student, however
there could be more based on your search criteria. Simply select the student by
ticking the checkbox and select/Enter in information such as, Provider,
Provider Amount, Provider GST, Paid To Provider, Mode etc. etc. Once all
information is entered/selected simply click on the  �icon as
indicated by the red arrow as shown above in figure 14.5.7b to update the
changes. You will see a green confirmation message as shown below in figure
14.5.7c �icon as
indicated by the red arrow as shown above in figure 14.5.7b to update the
changes. You will see a green confirmation message as shown below in figure
14.5.7c

Figure 14.5.7c
 �- This icon as indicated
by the red arrow as shown above in figure 14.5.7c allows you to Export current
data to Excel format. �- This icon as indicated
by the red arrow as shown above in figure 14.5.7c allows you to Export current
data to Excel format.
| 


