Human works are always prone to errors. You can modify
schedules and their respective payments by following the instructions below:
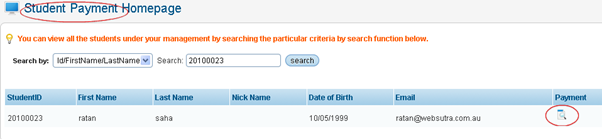
14.1.2.1 Once
you have logged in to RTOmanager, click Accounts>Student Payment as
shown in figure 14.1.2a. You will go to the page as shown below.

Figure 14.1.2a
14.1.2.2
Enter student ID (you may also enter student first name, last name)
whose payment you want to process for e.g. 20100023 as shown by red
circle in figure 14.1.2a.
14.1.2.3
Click .
You will go to the student payment Home page as shown in figure 14.1.2b .
You will go to the student payment Home page as shown in figure 14.1.2b
Figure
14.1.2b
14.1.2.4
Click  icon
in figure 14.1.2b. You will go to Student Payment Summary Page as shown
in figure 14.1.2c icon
in figure 14.1.2b. You will go to Student Payment Summary Page as shown
in figure 14.1.2c

Figure 14.1.2c

Please note that the schedule with invoice ID 360 does not have the remarks auto generated as shown in
figure 14.1.2c. This means that, this payment schedule has at least one payment
i.e. the payment with Transaction
No 180 & 186 . To delete a schedule you must first delete all respective
payments (Transaction No 180 & 186) as shown in figure 14.1.2c. However,
for those schedules which are not yet paid you can straight away modify the
schedule by clicking icon. icon.
14.1.2.5 To
edit (modify) the payment schedule (for e.g. invoice ID 302), click �icon
as shown in figure 14.1.2c. A modify payment schedule box appears as
shown in the figure 14.1.2d.
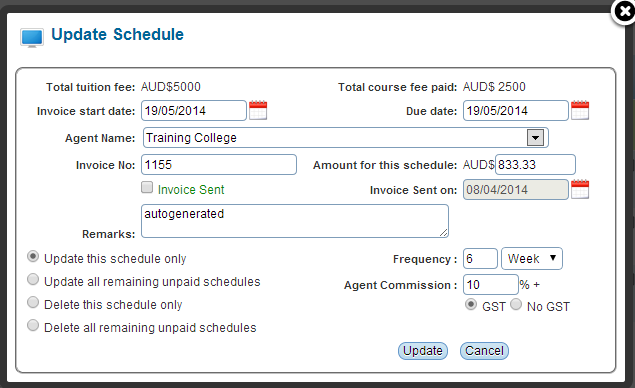
Figure 14.1.2d
14.1.2.6
Modify information on the pop up window as per your need as shown in figure
14.1.2d and click  �to
save the modification. �to
save the modification.
To make the changes to the current schedule only you should
select update this schedule only radio button as shown in figure 14.1.2d
(Please note that these options will be available only to those schedules which
are not paid at all). To make the changes to all remaining schedule you should
select update all remaining schedules radio button. Similarly you can
delete the current schedule by clicking Delete this schedule or delete
all remaining schedules by selecting appropriate radio button.
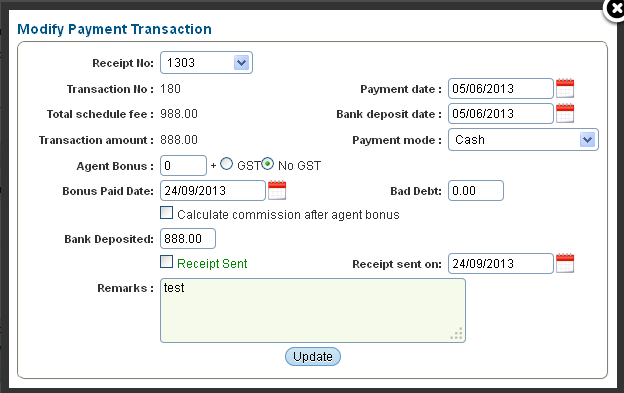
14.1.2.7� Similarly,
to modify the payment of a schedule, click  �icon
(for e.g. payment with transaction No 180) in figure 14.1.2c. Modify Payment
transaction pop up box prompts you to make changes as per your need as shown
in figure 14.1.2f. �icon
(for e.g. payment with transaction No 180) in figure 14.1.2c. Modify Payment
transaction pop up box prompts you to make changes as per your need as shown
in figure 14.1.2f.
Figure
14.1.2f
14.1.2.8� Modify
information as per your need in the figure 14.1.2f and click �to
save the modification.
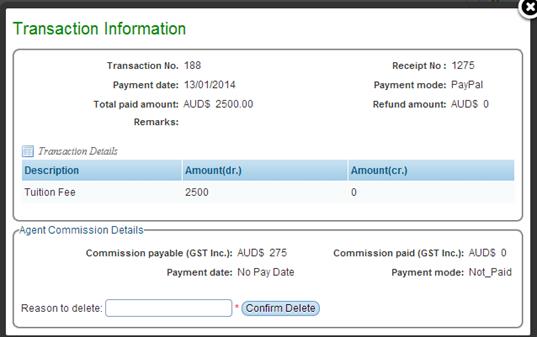
14.1.2.9� To
delete the payment transaction (transaction No 180 in figure 14.1.2c), click  �icon
as shown in figure 14.1.2c. A pop up box appears to confirm the deletion as
shown in figure 14.1.2g. �icon
as shown in figure 14.1.2c. A pop up box appears to confirm the deletion as
shown in figure 14.1.2g.
Figure
14.1.2g
14.1.2.10 Enter
some text in the field �Reason to delete� then Click Confirm Delete.
Payment for the schedule (Invoice no 188) will be deleted and the schedule is
re in stated as shown in figure 14.1.2h.
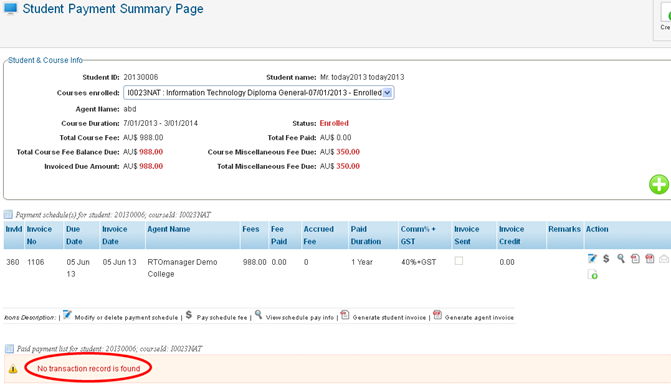
Figure 14.1.2h
Note: Please
note that No transaction record is found message is displayed in figure
14.1.2h which means there has not been any payments made for any of the
schedules in figure 14.1.2h.
| 


